Camping Gear Organization: Budget-Friendly Options (2026)
Camping gear has a way of multiplying?lanterns, stove parts, headlamps, cords, tarps, first-aid kits, chairs, recovery straps, and the ?just in case? items that somehow become mandatory after one bad trip. For car owners, the challenge isn?t only what to pack, but how to keep it organized inside a vehicle that still needs to be comfortable, safe, and drivable.
Smart organization does more than make your cargo area look tidy. It speeds up camp setup, prevents broken gear, reduces rattles, and keeps heavy items from becoming dangerous projectiles during sudden stops. The best part: you don?t need a pricey overlanding drawer system to get reliable results. With a few budget-friendly storage choices?and a plan for how you load?you can transform the way your car interior and cargo space handle camping.
This guide covers low-cost camping gear organization options that work in real vehicles: sedans, hatchbacks, SUVs, and crossovers. You?ll get practical layouts, product-style recommendations, step-by-step loading instructions, and the common mistakes that lead to messy cargo areas and lost gear.
Start With a Simple Gear Inventory (It Saves Money)
Before buying bins or organizers, take 15 minutes to list what you actually bring. Most ?organization problems? are really ?too many loose items? problems. A quick inventory helps you choose the right container sizes and avoid buying storage that doesn?t fit your trunk.
Quick inventory method (10?15 minutes)
- Group gear by function: Kitchen, sleep, shelter, lighting/power, tools/recovery, hygiene, clothing, food, and ?misc.?
- Estimate volume: Small (shoebox), medium (carry-on), large (big tote).
- Flag items that must be accessible: First-aid, rain jacket, headlamp, snacks, tire inflator, jump starter.
Real-world example: If your ?kitchen? gear is currently spread across five grocery bags, you?ll save time (and stop forgetting utensils) by dedicating one medium tote or a soft-sided kitchen bag to that category.
Budget-Friendly Organization Options That Work in Most Cars
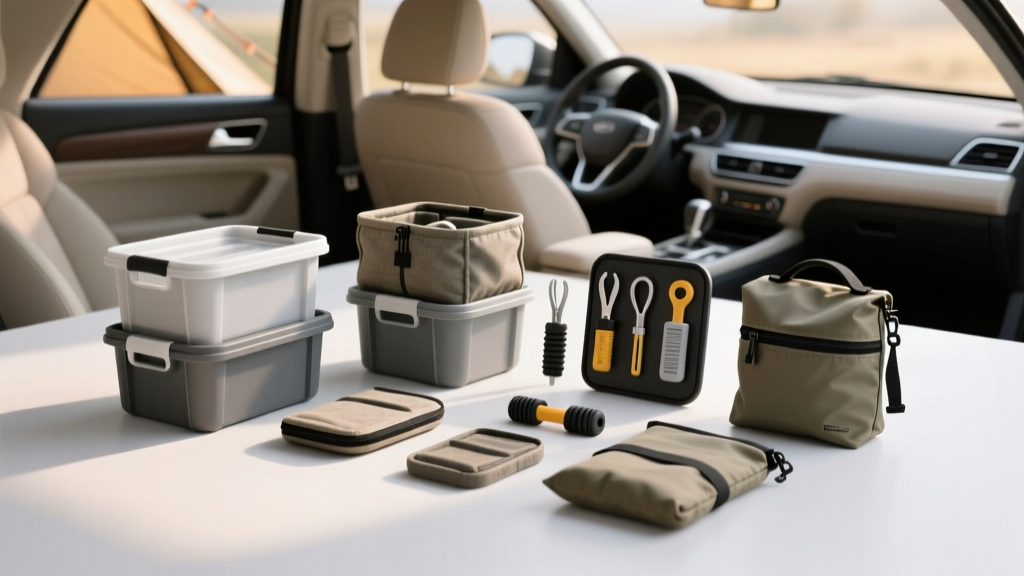
1) Clear plastic totes: the low-cost backbone
Clear totes are popular because they?re cheap, stackable, and easy to identify at a glance. They?re ideal for gear that stays in the vehicle for the season.
- Best for: Camp kitchen, pantry items, dry goods, backup layers, lanterns, tarps.
- Look for: Flat lids (better stacking), squared corners (better packing), sturdy latches.
- Budget tip: Buy two or three identical totes so they stack neatly and don?t waste space.
2) Collapsible fabric cubes and trunk organizers
Soft-sided organizers are excellent for daily drivers because they fold down when not camping. Many include dividers for separating smaller items.
- Best for: Groceries during the week, camping on weekends, kids? gear, quick-access items.
- Where they shine: Hatchbacks and SUVs where you want a tidy cargo area without permanent hardware.
- Watch for: Flimsy bottoms?choose a model with a rigid insert or reinforced base.
3) Milk crates: rugged, dirt-cheap, and modular
Milk crates are a classic budget setup for a reason: tough, ventilated, and easy to strap down. They also play nicely with bungee cords and ratchet straps.
- Best for: Recovery gear, cords, stakes, dirty items, camp tools, firewood gloves.
- Pro tip: Add a small towel or piece of foam in the bottom to reduce rattles.
- Upgrade for pennies: Zip-tie a piece of corrugated plastic to one side as a ?label panel.?
4) Vacuum storage bags for bulky soft goods
If you camp with bulky sleeping bags, blankets, or spare pillows, vacuum bags can free up serious space?especially in smaller vehicles.
- Best for: Sleeping bags, puffy jackets, spare bedding.
- Great for: Sedans and compact SUVs with limited cargo height.
- Caution: Don?t store down items compressed for long periods; use vacuum bags for trip transport, not long-term storage.
5) Seat-back organizers and MOLLE-style panels (budget versions exist)
Keeping essentials off the floor makes the cabin feel bigger and more comfortable. Seat-back organizers help prevent the ?camping sprawl? that creeps into passenger space.
- Best for: Flashlights, maps, bug spray, sunscreen, snacks, wipes, small tools.
- Ideal for: Families and anyone road-tripping to campgrounds.
- Real-world use: Put headlamps and a small first-aid pouch behind the driver?s seat for quick stops at night.
6) Under-seat bins and low-profile slide boxes
Under-seat storage is often underused. Low-profile bins can hold gloves, paper maps, tire gauge, or a compact med kit.
- Best for: Small essentials you want to keep in the car year-round.
- Fit tip: Measure the under-seat clearance before buying. Some vehicles have wiring or vents under the seats.
7) Inexpensive cargo nets, bungees, and tie-down straps
Even the best bins don?t help if they slide around. A simple cargo net or a pair of cam buckle straps is one of the cheapest ways to improve safety.
- Best for: Stabilizing stacks, holding jackets, securing coolers, preventing tip-overs.
- Choose: Cam buckle straps for easier tensioning than ratchet straps (and less risk of crushing gear).
Smart Layouts for Different Vehicle Types
Sedan trunk: ?layered? organization
Sedan trunks reward flatter, longer containers and a two-layer approach.
- Bottom layer (heaviest): Water, cooler (if it fits), tool kit, stove fuel (upright and sealed).
- Middle layer: Two medium totes?kitchen and pantry.
- Top layer (lightest): Bedding in a duffel, camp chairs, jackets.
Tip: Use a trunk organizer near the opening for roadside-access items like a headlamp, paper towels, and trash bags.
Hatchback: ?zones? that prevent pileups
Hatchbacks are prone to gear sliding forward. Create zones with one large tote, one soft organizer, and a net.
- Rear zone (closest to hatch): Kitchen tote and pantry tote?easy access at camp.
- Middle zone: Bedding/clothing duffel.
- Front zone: Emergency/vehicle gear tucked behind the seats.
SUV/crossover: ?stack + strap? approach
With more vertical space, SUVs benefit from stacking?but you still want stability.
- Base: Two matching totes side-by-side (kitchen/pantry).
- Top: Soft duffels and lightweight items.
- Secure: One strap across the stack anchored to cargo hooks.
Step-by-Step: Build a Budget Camping Organization System in One Afternoon
- Measure your cargo area. Note width between wheel wells, depth to the seats, and cargo height under the rear shelf (if applicable).
- Pick 2?4 ?core? containers. Aim for:
- 1 kitchen tote
- 1 pantry/food tote
- 1 sleep/clothing duffel
- 1 small ?quick access? bin
- Label containers clearly. Painter?s tape and a marker work fine; upgrade later to printed labels.
- Create mini-kits inside each tote. Use zip pouches:
- Kitchen: utensils pouch, spices pouch, dishwashing pouch
- Tools: tire kit pouch, electrical/zip ties pouch
- Hygiene: toothbrush kit, wipes kit
- Load heavy and rarely used items first. Examples: extra water, tool kit, backup fuel canisters (properly sealed), leveling blocks.
- Load ?first at camp? items last. Examples: headlamp, tarp, camp chairs, insect repellent, rain jacket.
- Secure the stack. Use cargo hooks with a net or straps so nothing shifts under braking.
- Do a 5-minute rattle test. Drive around the block. If something clunks, add a towel, foam, or tighten the strap.
Budget Product Recommendations (What to Look For, Not Brand Hype)
Prices vary by region and season, so focus on features that deliver value.
Best overall: matching medium totes (2?3 pack)
- Why: Stack cleanly, flexible for most gear categories.
- Feature checklist: flat lids, solid latches, not overly tapered.
- Ideal user: Weekend campers who want repeatable packing.
Best for quick access: collapsible trunk organizer with dividers
- Why: Keeps small items from becoming door-pocket clutter.
- Feature checklist: rigid bottom insert, at least 2 compartments, side pockets.
- Ideal user: Daily drivers who don?t want permanent bins.
Best for rugged/dirty gear: milk crates + bungee net
- Why: Dirt and moisture don?t ruin them; easy to rinse.
- Feature checklist: thick plastic, no cracks, consistent size if stacking.
- Ideal user: Dispersed campers, anglers, hikers with muddy gear.
Best comfort upgrade under $20: a few zip pouches
- Why: Stops ?junk drawer tote? syndrome and speeds up setup.
- Feature checklist: strong zipper, washable fabric, different colors for categories.
- Ideal user: Anyone who?s tired of searching for a lighter or can opener.
Practical Tips That Make a Big Difference
- Color-code categories: Blue for kitchen, green for sleep, orange for safety/emergency.
- Keep a ?camp trash kit?: Roll of bags + a couple grocery sacks + gloves in one pouch.
- Use the passenger footwell wisely: A small soft cooler or day bag goes here if you need it during the drive.
- Pack by timeline: ?Road? items (snacks, wipes) in the cabin; ?arrival? items (chairs, tarp) near the hatch; ?later? items deeper in cargo.
- Minimize duplicates: One headlamp per person sounds right?until you also have lanterns, flashlights, and phone lights. Decide what you truly use.
Common Mistakes to Avoid
- Overbuying containers before measuring. A tote that?s 1 inch too wide wastes space and triggers frustrating repacking.
- Mixing heavy and fragile items. Cookware and glass jars don?t belong on top of a recovery strap and hatchet.
- Ignoring tie-down points. Unsecured bins can shift and damage interior trim?or worse, injure passengers in a crash.
- Creating a ?misc? bin that grows forever. If it doesn?t have a category, it doesn?t have a place. Re-sort after every trip.
- Storing fuel or scented items improperly. Keep fuel sealed and upright, and avoid leaving strong-smelling items in the cabin where odors soak into upholstery.
- Blocking your rear view with tall stacks. If you must stack high, keep the tallest items low and forward, and use your cargo cover where possible.
FAQ: Budget Camping Gear Organization for Cars
What?s the cheapest way to organize camping gear in my car?
Start with two matching totes, a couple zip pouches, and one cargo strap. This combination covers most gear categories and prevents shifting without spending much.
Are clear totes better than solid-color bins?
Clear totes make it easier to find items quickly, especially at night with a headlamp. Solid bins can look cleaner and block sunlight (helpful for certain items), but you may rely more on labels.
How do I keep bins from sliding around in the cargo area?
Use your vehicle?s cargo hooks with a net or cam buckle straps. If your cargo floor is slick, add a low-cost non-slip mat or a piece of rubber shelf liner under the bins.
What should always be easy to access while driving to camp?
Keep these within reach: headlamp, small first-aid kit, water bottle, snacks, wipes, phone charger, and a compact rain layer. A seat-back organizer or small cabin bin works well.
How do I organize gear for a family camping trip without cluttering the cabin?
Give each person a duffel and limit cabin items to a single ?road bin? (snacks, wipes, chargers) plus a small trash bag. Everything else stays in labeled totes in the cargo area.
Do I need a rooftop box to stay organized?
Not necessarily. Rooftop boxes add capacity, but most organization problems can be solved with smarter containers, labeling, and a load plan. If you routinely run out of space after organizing, then a rooftop box becomes a logical next step.
Next Steps: A Simple Plan for Your Next Trip
If you want a cleaner, safer, more camping-ready car interior without overspending, aim for a repeatable system:
- Choose 2?4 core containers that fit your cargo area.
- Assign categories (kitchen, pantry, sleep, safety) and label them.
- Use pouches for small items so nothing becomes a loose mess.
- Secure everything with straps or a cargo net.
- Refine after each trip by removing what you didn?t use and improving what slowed you down.
Want more practical car interior guides for road trips, storage, and comfort upgrades? Explore the latest how-tos and gear organization tips on carinteriormix.com.